

As an Amazon Associate we earn from qualifying purchases.
The best wood burning tool depends on the mark you want to make. For a first wire-nib burner with adjustable heat, start with the Walnut Hollow Creative Woodburner. For lettering and mixed craft projects, the TRUArt Stage 1 is a more complete solid-tip kit. If your goal is detailed shading and frequent artwork, the TRUArt Stage 2 single-pen station is the stronger investment; move to its dual-pen version when switching nib shapes breaks your flow.
Adjustable wire nibs for trying fine lines and shading without a large station.

Organized solid-tip kit for names, gifts, stamps, and beginner practice.

Close-grip wire pen and finer heat adjustment for repeat illustration work.
| Tool | Type | Best reason to choose it | Main tradeoff |
|---|---|---|---|
| Walnut Hollow Creative Woodburner | Adjustable wire-tip tool | Fine lines and shading without a large station | Four included nibs limit the initial range |
| TRUArt Stage 1, 35-Tip Aluminum Case Kit | Solid-tip pen; two power modes | Signs, coasters, stamps, and mixed wood/leather crafts | 15 W/30 W switch is not fine heat control |
| TRUArt Stage 2 Single Pen, 40-Tip Kit | Single-pen wire-nib station | Fine drawing and repeatable tonal practice | One pen means cooling or changing nibs between jobs |
| TRUArt Stage 2 Dual Pen, 40-Tip Kit | Dual-pen wire-nib station | Alternating outline and shade nibs in one project | Two ready pens, but one active at a time |
| Weller WLIWBK2512A 15-Piece Kit | Solid-tip 25 W pen | Simple lettering and branding with a short grip-to-tip reach | Fixed output; less nuanced shading |
| Walnut Hollow Creative Versa-Tool | Adjustable solid-tip tool | Woodburning plus stamping, soldering, or hot-knife craft tasks | Larger brass tips are less precise than wire nibs |
| Chandler Tool CTWB30 Wood Burning Kit | Solid-tip craft pen | Occasional gifts and bold motifs without an oversized kit | Fewer points and less heat finesse |
A screw-in brass point has more mass, which suits simple outlines, thick letters, dots, and decorative stamps. The TRUArt Stage 1 offers a broad organized kit; the Weller has a short-barrel grip; Chandler Tool keeps the accessory set small. Expect a pause to let hot points cool before changing them. A 15 W/30 W switch gives two power levels, while the Versa-Tool offers variable control.
A wire nib can place a narrow hot edge close to your hand. The Walnut Hollow Creative model is a compact entry point with four nibs. The TRUArt Stage 2 stations add a handpiece, control box, and more included tip shapes. Start on a low setting and adjust using scrap from the same board; the controller number is a setting, not a promise that every nib reaches the same surface temperature.
A dual-pen station earns its place when your design alternates between a writer and a shader. You can leave both shapes installed and select the handpiece you need. It does not mean two people can burn at once. If you work one stage at a time, spend less on a single-pen station and choose a couple of nibs you will actually use.
Clean, unfinished, sanded basswood and pale poplar make it easier to see light marks and control the line. Strong grain, resin, and knots can interrupt a fine stroke; dense wood may need slower movement and careful heat adjustment. A wood species guide helps you pick a practice blank. Avoid burning painted, pressure-treated, or unknown coated wood, and do not assume all plywood glues are suitable to heat.
Key details: Wire-tip pen · adjustable heat · drawing, ball, universal shading, and rounded shading tips · stand and tweezers included.
The Creative Woodburner is a sensible step into wire-tip work. Its slimmer working end and four purpose-built nibs let you practice outlines, dots, and shaded areas without buying a large collection of points first. Heat adjustment helps you find a light mark on a practice scrap before touching the final piece.
Its narrow included tip selection is the tradeoff. If you already know you want a broad menu of textures or will swap nibs repeatedly during a session, the TRUArt Stage 2 station below offers more room to grow. The Walnut Hollow tool is strongest for an artist testing whether wire nibs suit their hand and projects.
Key details: Solid-tip pen · 15 W and 30 W settings · 35 tips and accessories · aluminum storage case.
This kit is a practical first purchase when your projects include lettering, simple outlines, stamping, and occasional leather work. The red pen, assorted screw-in tips, rest, and case are organized together. The 15 W/30 W switch offers two useful power levels, though the exact mark still depends on the wood and the speed of your stroke.
The brass points hold more thermal mass than a thin wire nib and the grip sits farther from the burning edge. That can be comfortable for bold strokes but makes delicate hairlines and gradual portrait shading harder. Choose this kit for broad craft variety; choose a Stage 2 wire-tip station if subtle tone is the goal.
Key details: 60 W station · digital voltage control · one wire-nib handpiece · 40 tips and case.
The Stage 2 single-pen station is the most convincing upgrade when you intend to burn illustrations often. The handpiece holds close to the working nib, and the control box lets you make smaller heat changes than a two-position craft pen. The supplied selection spans line and shading shapes, so you can discover which nibs suit your style before buying extras.
The display indicates control settings rather than a guaranteed temperature at the wood. Make a sample strip for each wood species and nib. Because only one handpiece is connected, changing between a fine writer and a wide shader still interrupts your flow. The dual-pen model below earns its extra cost only if that switching happens frequently.

Key details: 60 W station · digital voltage control · two handpieces · 40 tips and case · 110 V US plug.
Two handpieces let you leave one nib set up for fine lines and the other for shading. That is useful on a portrait or illustration where the pattern changes repeatedly, and it avoids repeatedly removing a hot nib. The core control and tip family are otherwise similar to the single-pen Stage 2 kit.
The second port is a workflow convenience, not two simultaneous burning stations: select the pen you are using. It costs more and needs more table space. If you normally finish all outlines before shading, the single-pen model is the simpler buy. TRUArt also notes that its Stage 2 tips do not simply fit other brands such as Walnut Hollow; check replacements for the exact pen.
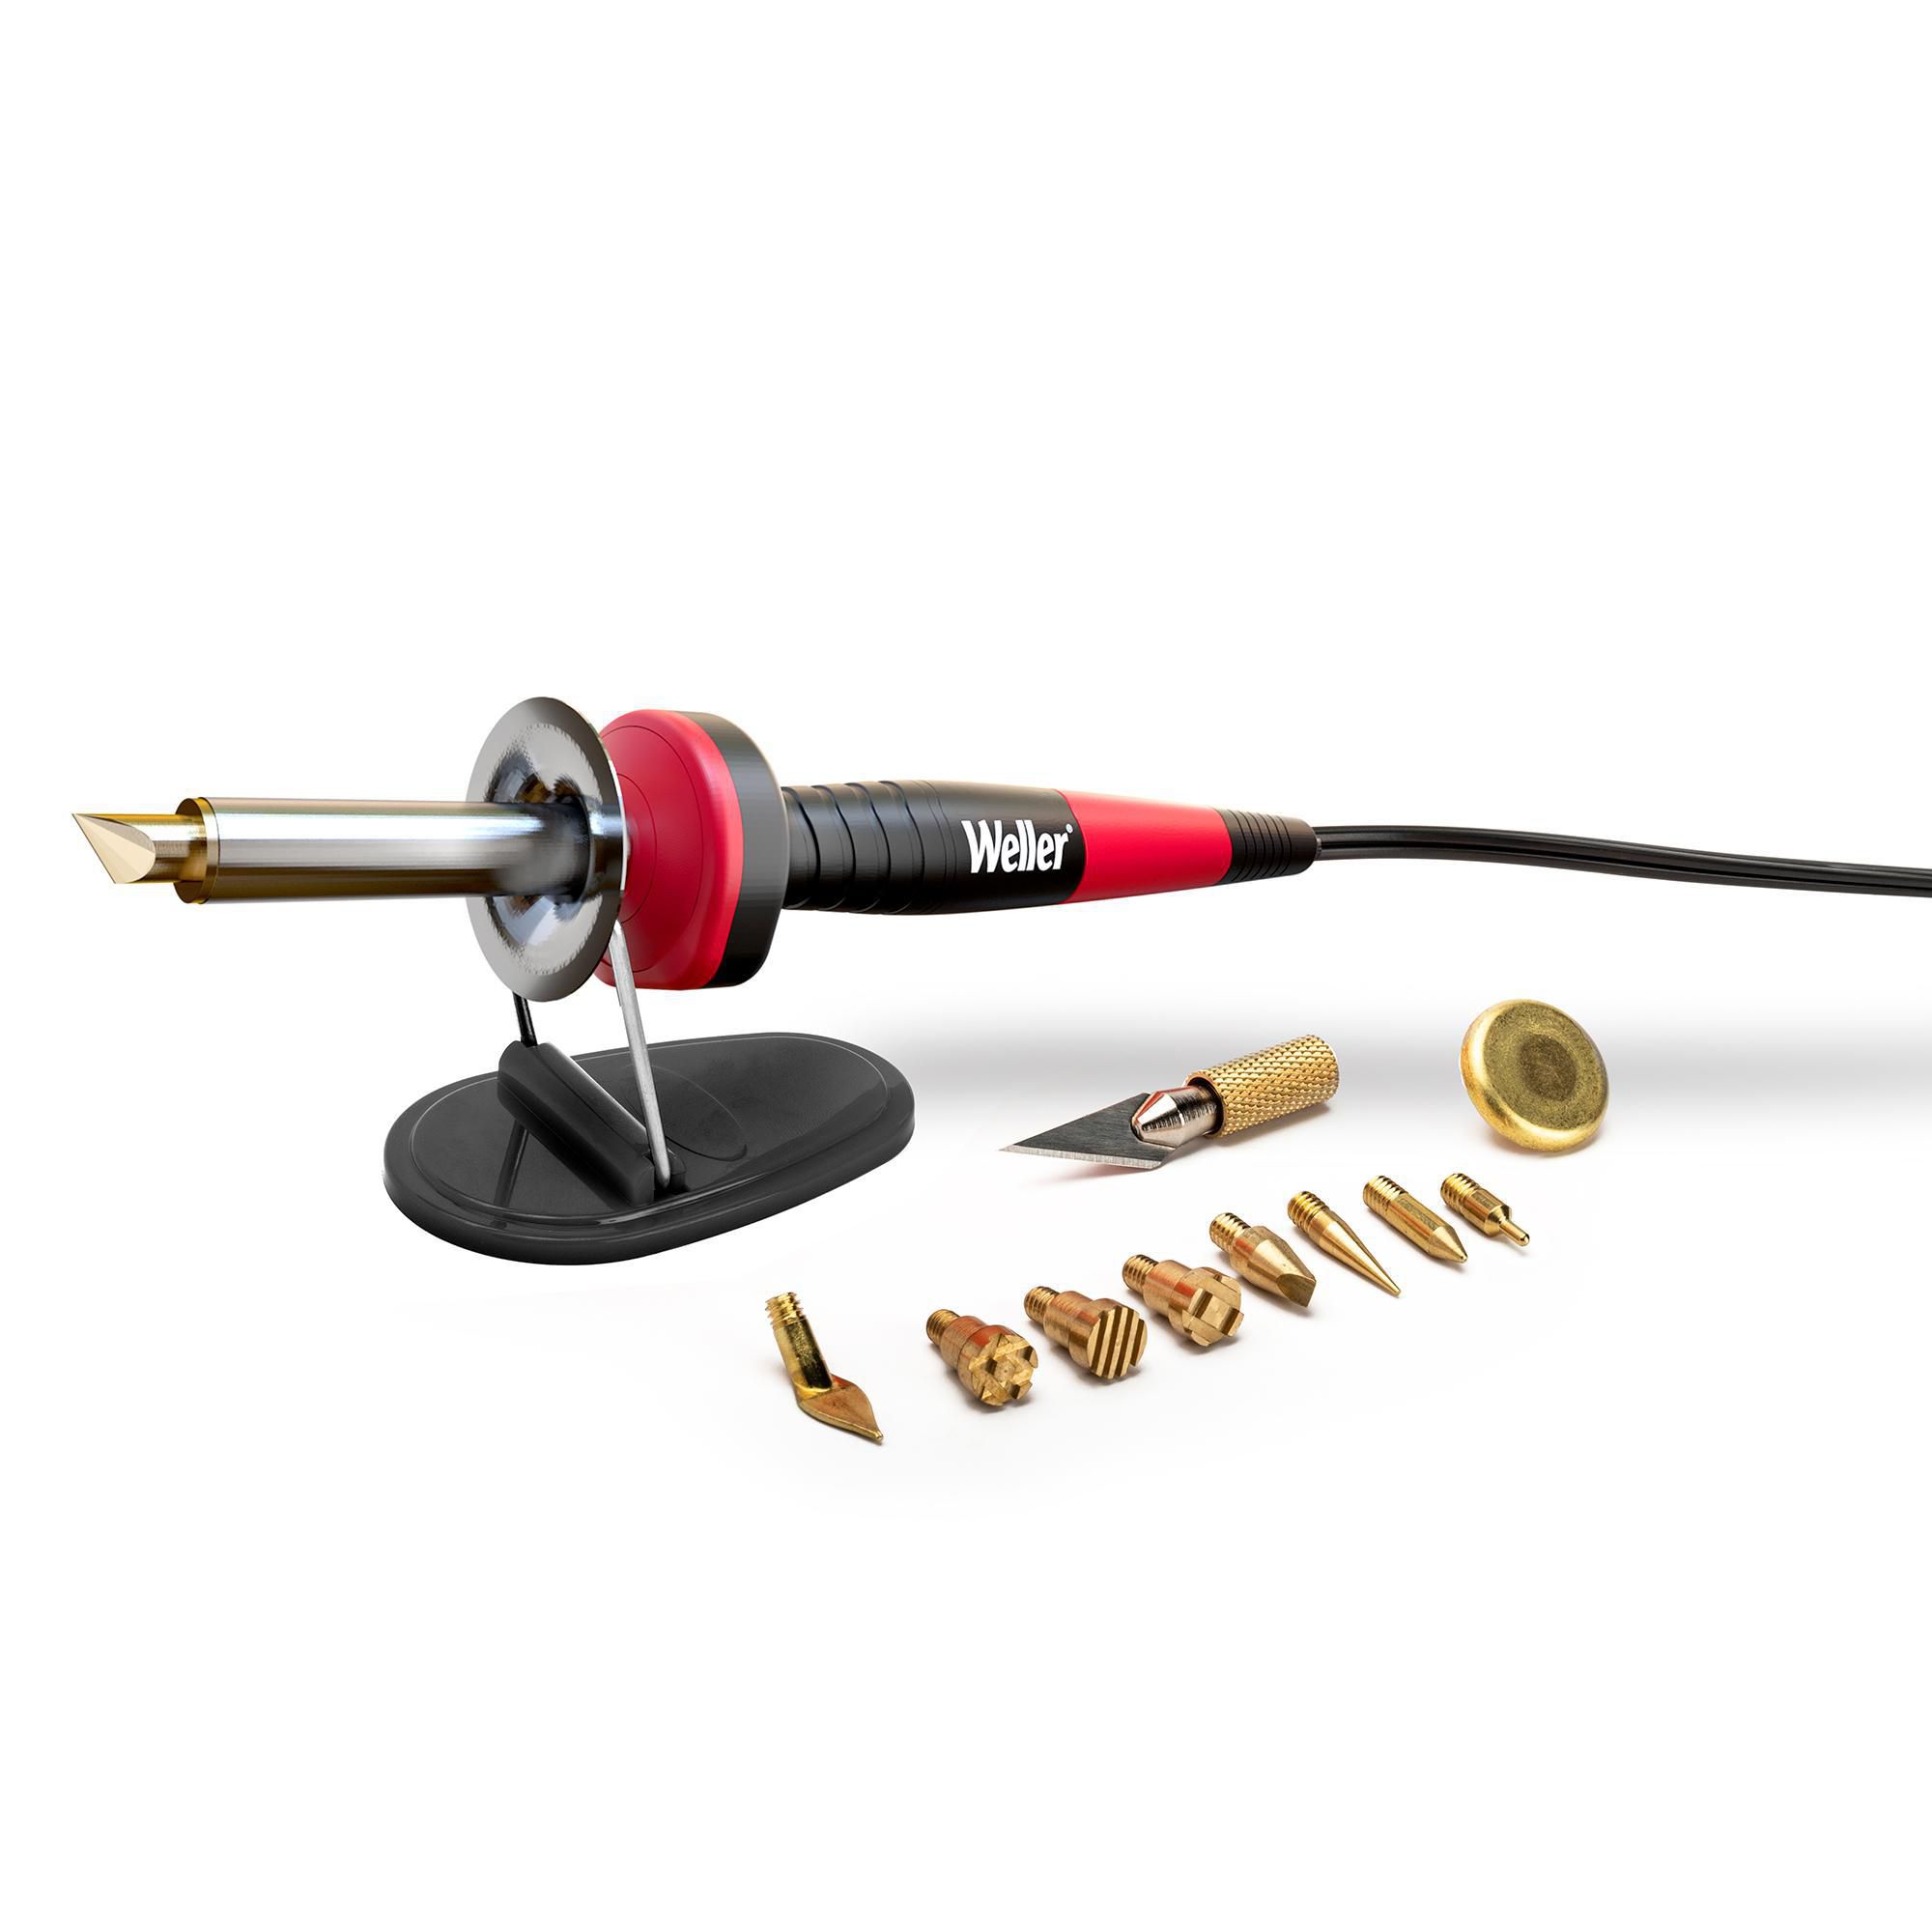
Key details: 25 W · 120 V US kit · 15 pieces · short-barrel iron with integrated rest.
Weller’s short-barrel layout places your hand closer to the tip than many ordinary long soldering irons. That helps when you want to follow a template around a letter or a small badge. The 15-piece pack includes several point styles for wood and leather embossing, and the integrated rest gives the hot iron a designated place on the table.
There is no station dial to tune a gentle shade. The iron is better suited to straightforward marks than sustained portrait work. Check that the listing is the 120 V WLIWBK2512A version: Weller also sells visually similar kits for other voltages and different piece counts.
Key details: Variable heat control · 11 interchangeable points · craft, stamping, hot-knife, and soldering uses.
The Versa-Tool makes sense when your craft table hosts several heat-based projects. Its assortment includes drawing and shading points alongside a hot knife and soldering point, so it is more versatile than a dedicated fixed-heat pen. The on-tool control offers more adjustment than a simple high/low switch.
Versatility comes with a thicker solid-point feel. It is not a substitute for the light, close-to-the-wood wire nib of a dedicated illustration station. Buy it for signs, stamps, and mixed craft tasks, and make sure the tool has cooled before changing threaded points.
Key details: Solid-tip pen · eight included tips · simple starter assortment.
Chandler Tool’s eight-tip kit gives a beginner a smaller assortment to learn. It covers simple outlines and decorative marks without the clutter of a very large mixed accessory case. The straightforward pen works best on prepared, pale wood for coasters, ornaments, and names.
It is a basic craft burner, so select it for occasional projects rather than subtle layers of tone. Use a light hand: Chandler advises that forcing a brass tip can bend or damage it. If you expect to practice detailed drawing every week, the adjustable wire-tip choices are easier to grow with.
A fine writer handles outlines and small lettering; a rounded or spoon-like shader helps fill an area smoothly; a ball point makes dots and textured backgrounds. A kit with dozens of tips may include duplicates, stamps, soldering bits, or a hot knife rather than dozens of useful drawing nibs. Confirm the exact assortment in the live listing and whether replacement tips fit that brand and pen.
Look at the distance from fingers to heated point and whether the cord drags on your hand. A short barrel or slim wire-nib pen can make small curves easier to guide. A stable, heat-safe stand is more valuable than an extra decorative point because the tool needs a secure place during every pause. Arrange the cord away from the hot nib and the work edge.
A two-step power switch, a variable dial, and a digital voltage controller offer different amounts of adjustment. None automatically compensates for wood species, nib mass, or stroke speed. Keep a scrap test strip and record the settings that make a light, medium, and dark mark. The listed kits here are US-oriented; check your outlet voltage and the exact regional model before ordering.
| What you see | Likely cause | Try next |
|---|---|---|
| Line catches or goes patchy | Rough surface, dense grain, or moving too quickly | Sand a matching scrap; slow the stroke and test along/across grain |
| Dark blobs at line starts | Pausing with a hot nib in one spot | Begin the stroke while moving; test a lower setting or faster entry |
| Tip drags and barely marks | Insufficient heat, dirty point, or unsuitable wood | Let it heat, clean according to the maker, then test on bare basswood |
| Shading looks striped | Narrow nib or uneven contact | Use a rounded shader, overlap light passes, and rotate the board |
No. A solid-tip pen is a useful, simpler tool for bold letters, stamps, and occasional craft work. A wire nib is easier to guide for fine illustration and nuanced shading, but a station costs more and requires you to learn its heat response.
A suitable iron can make basic marks, but ordinary soldering tips and a long grip are less convenient for drawing. A dedicated woodburning kit gives you appropriate points and a rest. Keep tips dedicated to each task and follow the tool maker’s instructions. See our wood burning with a soldering iron guide.
Unfinished basswood is a forgiving starting point because its pale, relatively even surface makes marks visible. Poplar is another useful practice wood. Grain and hardness still vary from board to board; test the exact offcut before your finished project.
Do not heat unknown finishes, paints, pressure treatments, or glues. Their fumes and burn behavior can be unpredictable. Work on bare, known wood and apply a compatible finish only after the artwork is complete and cool.
The TRUArt Stage 2 dual kit is for switching between two set-up handpieces. It is not a two-person simultaneous workstation. Check the selected port and rest the inactive pen safely.
For a first wire-nib tool, choose the Walnut Hollow Creative Woodburner. For a complete solid-tip introduction to lettering and mixed crafts, choose TRUArt Stage 1. For detailed pyrography that you plan to practice regularly, choose the TRUArt Stage 2 single-pen station; its dual-pen sibling is worth considering when you alternate writer and shader repeatedly. The Weller, Versa-Tool, and Chandler kits serve simpler or more varied craft work. Begin on bare basswood and judge each heat setting on matching scrap.